Selecting Time Range and User Interface Elements
VoceVista has different options that enable you to select:
-
time range of a recording
-
some elements on the user interface such as multiple piano keys and note sliders
Learning how to select/de-select these items, especially the time range of a recording, is extremely important as it enables you to precisely analyze a range, loop it, apply filters, and other use other application tools.
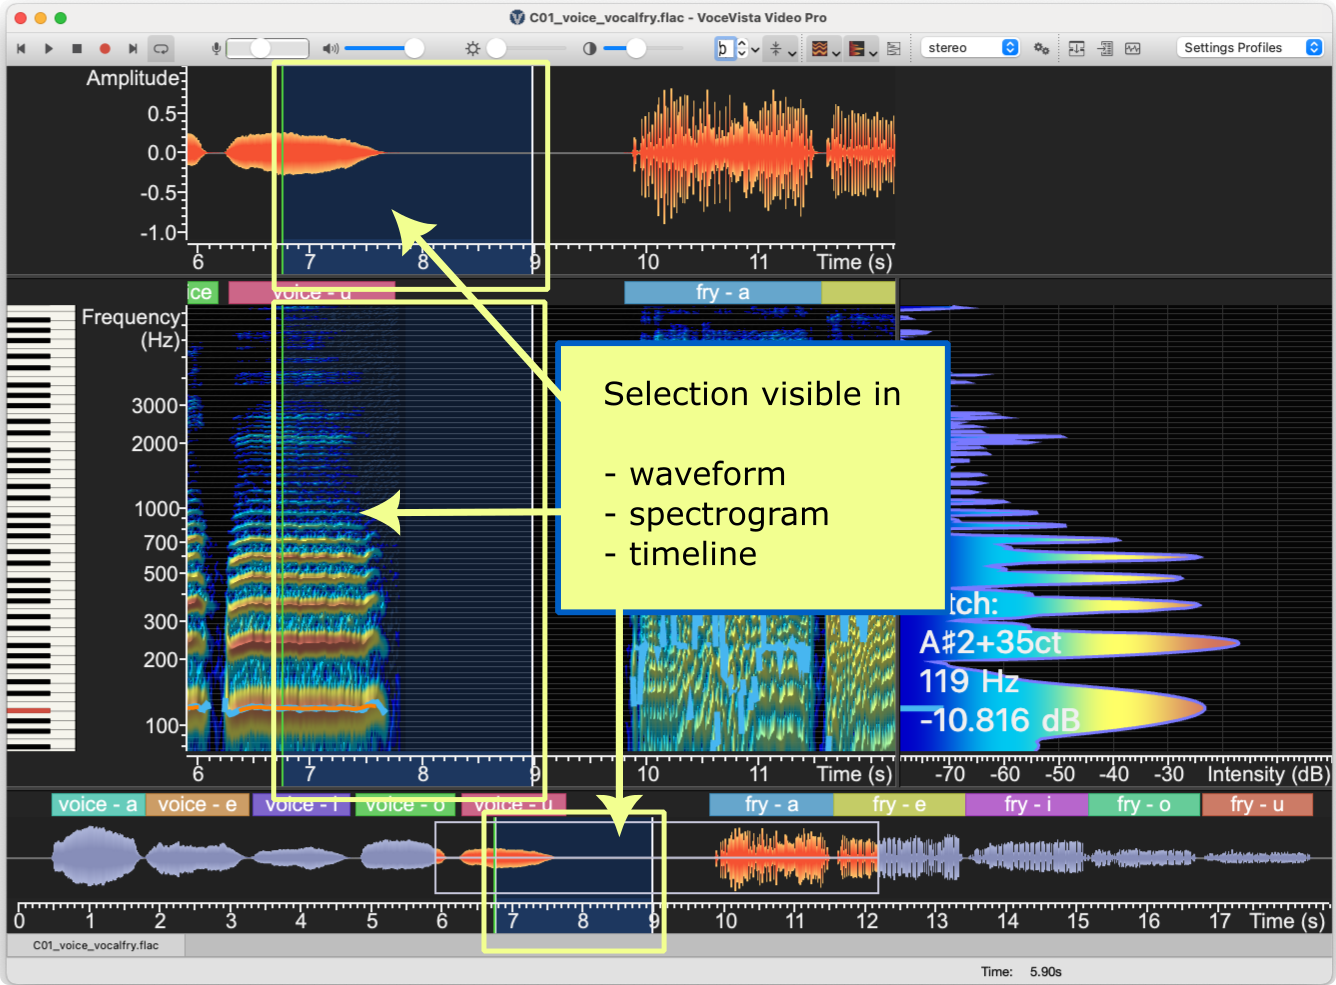
The following graphic shows a file with a portion selected (hightlighted background) for further analysis/manipulation.
Selection Options Using Mouse
There are two main options for using your mouse to select/de-select time ranges in a file.
In the spectrogram, waveform or timeline:
-
Press the Command key (on Mac), or the Control key (on Windows) (default) while clicking and dragging your mouse to select or de-select. (default setting) This setting is better if you are making a selection and then using different methods to further analyze the recording because you won’t lose your selection if you click somewhere else.
-
Click and drag your mouse to make a selection (change option in settings). Click anywhere in the spectrogram, waveform or timeline to de-select. Some workflows are much easier and quicker if you can click and drag on the user interface to select part of a file. To enable this behavior, go to Selection Settings page and check Lock Selection.
Regardless of which option you have enabled, once you have selected part of the file, you can click and drag the left and right borders of an existing selection to make it longer or shorter. You can tell which area is selected because the background color changes in the waveform, spectrogram and timeline.
Selection Options Using Menus
You can also use menus and associated keyboard shortcuts to quickly and precisely select or view a time range:
-
Click to select the entire range
-
Click to select the entire range that is visible
-
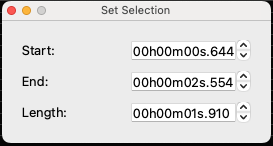
Click to more precisely select a range using time values
-
Click to lock the range that you have selected (see below)
-
Click to set the visible time range to match the current selection
Working with a Time Selection
Once you have selected a time range, you have a number of options to view and work with it:
-
Press the Play button to play it repeatedly. You can configure the application to play the selection once by de-selecting on the Playback Settings of the Settings window. When you select this option, you can click the Loop button on the main toobar to have the selection repeat.
-
Cut, copy, paste, etc. the current selection
-
Refine your selection by selecting to enter exact values for the range.
Locking a Selection
If you click anywhere on the timeline or the spectrogram, the playback cursor will jump to that position, and the current selection will be reset. Sometimes you might want to maintain a selection, but still move the cursor within the selection to hear specific parts. This is particularly useful when comparing files, and when working with Frequency Filters.
To lock the selection, click . You can still resize the selection by clicking and dragging its borders, but you won’t lose your selection if you click somewhere on the Timeline or Analyzer View.